
Garage Door Works Manually But Not the Opener? 4 Checks
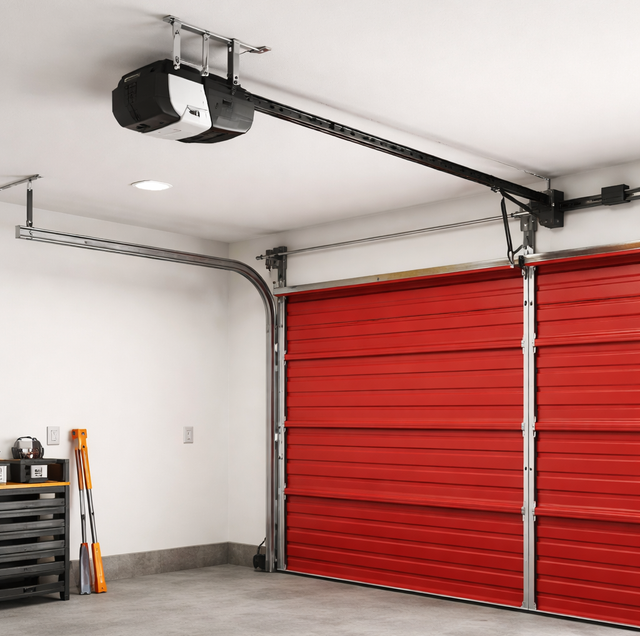
The instinct when a garage door stops opening is to blame the springs, assuming that anything the motor will not lift must be too heavy for it. There is a fast way to rule that out entirely: pull the red emergency-release cord and lift the door by hand. If it glides up on one steady push with barely any resistance, the springs and balance are fine, full stop, and the actual fault lives somewhere else entirely, in the opener path rather than the door itself. Reconnecting the trolley and getting nothing, or a hum and a flicker with no real movement, or a strain against something that clearly is not the door's weight, all point to one of four specific opener-side failures, and reading them in the right order finds the answer without a single tool coming out.
What an Easy Manual Pull Rules Out
A garage door's weight is carried by its springs, torsion springs mounted above the door on a shaft, or extension springs stretched along the upper tracks, working through cables, drums, and rollers to counterbalance roughly everything the door weighs. When that system is doing its job, a person can lift or lower the door by hand with light, steady effort. When it isn't, the door feels heavy, drops suddenly, or won't stay put partway. A door that glides smoothly under manual power is telling you something specific before you ever touch the opener: the springs are still holding tension close to their design range, the cables and drums are tracking evenly, and the rollers ride the tracks without binding. The counterweight system, the part that fails most dramatically, is already ruled out. What's left is narrower: the motor, the drive mechanism connecting the motor to the door, and the electronics telling them both what to do.
The Self-Checks, In Order
Work through these with the door disconnected from the opener (trolley released) and the power still on at the outlet, unless a step tells you otherwise. Each one isolates a different link in the chain between the button and the door.
| Check | What You're Looking At | What It Tells You |
|---|---|---|
| Trolley engagement | Whether the carriage on the rail is actually latched to the drive mechanism, not just resting near it | A disengaged trolley lets the motor run all day without ever pulling the door |
| Belt or chain condition | Slack, a gap in the rail, or visible fraying and rust along the drive line | A slipped or broken drive line means the motor spins but nothing transfers to the door |
| Motor housing response | Lights, sound, and any blinking pattern when the wall button is pressed | Distinguishes a dead logic board from one that's running but faulting out |
| Disconnect lever position | A small mechanical switch some openers carry near the trolley, separate from the release cord | Left in the manual position, it blocks the drive even with a healthy motor and intact belt or chain |
Before the Trolley: Rule Out the Remote and the Wall Console
One failure sits outside all four checks above because it never touches the drive mechanism at all: the remote or wall control not sending a usable signal in the first place, rather than the motor failing to receive or act on one. It's worth ruling out before disconnecting anything, since it takes seconds and skips the whole diagnostic chain if it turns out to be the actual cause.
Batteries and the wall button: A remote running on a weak coin or AA battery can transmit an intermittent or dead signal while the wall-mounted button, wired directly to the logic board, still works normally, which is easy to mistake for an opener failure if the wall button was never tried on its own. Press the wall button first: if the door runs from the wall but not the remote, the fault is almost certainly the remote's battery or its pairing, not the motor, belt, or trolley at all.
The console's LOCK feature: If the remotes and the outdoor keypad are all dead while the wall button still runs the door normally, check the console's lock before you touch anything on the rail. It gets switched on by accident more often than on purpose, and a blinking indicator on the panel usually gives it away; holding the LOCK button down until that indicator changes state clears it. What the lock actually does, and why it is not a door lock, is covered in the wall control guide.
If the wall button also does nothing, or the remote and wall button fail the same way, the fault has moved past the control side and into the drive line itself, and Step 1 below is the next place to look.
Step 1: Confirm the Trolley Is Actually Caught on the Rail
The trolley is the small carriage that rides the rail and connects, through a short arm, to a bracket on top of the door. Pulling the red cord disengages a spring-loaded latch inside the trolley from the drive mechanism, which is exactly what lets you move the door by hand in the first place. Reconnecting it usually just means pulling the cord toward the motor an inch or two, or running the opener briefly so the latch catches as the carriage passes over it; most models are built to re-engage on their own the next time the door cycles a short distance. If that latch never catches, the motor turns the belt, chain, or screw drive without any of that motion reaching the door at all, which looks, from the button, exactly like a dead opener even though the motor itself is fine. It's the same principle as a car left in neutral: the engine can run at full effort, and the wheels never turn, because nothing downstream of the motor is actually connected. Look at the trolley itself, not just the rail, before assuming the problem is electrical.
Step 2: Follow the Belt or Chain for Slack, Slip, or a Break
Chain-drive openers run a metal chain over a sprocket at the motor end and an idler pulley at the far end of the rail; belt-drive openers use a reinforced rubber or fiberglass belt over the same layout. Both wear the same way over years of cycling: the chain can stretch at its master link until it skips teeth on the sprocket instead of gripping cleanly, and the belt can crack, glaze, or fray at the edges until it slips under load. Either failure produces a similar symptom at the button: the motor runs, sometimes normally, but the trolley doesn't move or moves erratically instead of tracking smoothly. A full break is easy to spot: a length of chain or belt hanging loose or missing from part of the rail. Partial slippage is subtler; watch the rail while someone presses the button, and look for the drive line bunching or sagging out of its channel instead of running flat and taut.
Step 3: Read the Motor Housing for Life, Not Just Sound
The logic board is the circuit board inside the motor housing that receives the button or remote signal and tells the motor when to run, how far, and how hard to push before treating resistance as an obstruction. A completely dead board shows no lights, no hum, nothing at all when the button is pressed, which usually points to a power problem at the board itself rather than the drive mechanism. A board that's alive but faulting looks different: a light flickers or a status LED blinks in a pattern, the motor hums for a second and stops, or it runs and reverses immediately as if it sensed resistance that isn't really there. That second pattern usually means the board is receiving the signal and trying to respond, but something in its own settings, most often the force or travel-limit calibration, has drifted enough that it's second-guessing normal operation. That's a different repair than a board with no power at all, so noting which pattern you're seeing before calling anyone saves a diagnostic step later.
Step 4: Look for a Disconnect Lever Left in the Manual Position
Screw-drive openers, and some older belt and chain models, carry a second way to take the drive out of gear: a small mechanical lever or toggle mounted at the trolley, separate from the red pull cord. It exists for the same reason the cord does, to let the door move by hand during a power outage or a repair, but it's easy to bump during a light bulb change, a shelf installation near the rail, or general garage maintenance, and just as easy to forget about afterward. Unlike the rope release, which usually re-engages the next time the door runs, this lever stays wherever it's set until someone physically moves it back. If the first three checks come back clean- motor alive, drive line intact, trolley caught- this lever is worth a second look specifically, because it's the one cause on this list that a normal glance at the rail can miss entirely.
Why the Opener Path Fails Even When the Door Itself Never Struggled
None of the four checks above happen in a vacuum. Sustained heat and UV exposure stiffen and crack belt material and can push the electronics inside a motor housing to run hotter than they're rated for, shortening the working life of both well before the springs show any wear. Sudden power surges during severe storms hit the logic board directly, and a board can take that hit hard enough to stop responding while the belt, chain, and trolley around it stay completely undamaged. High humidity promotes corrosion at chain links, idler pulley brackets, and the logic board's own connector terminals, adding resistance in places that see far less attention than the springs. None of this runs one direction, either: cold snaps stiffen belt rubber and slow motor response just as summer heat does, so a drive line that struggles in August can struggle again for a different reason once temperatures drop. A garage door serving as the household's main entry also cycles more per year than one used occasionally, wearing the trolley latch spring, master link, and belt teeth faster on the same calendar timeline.
When the Self-Check Points to a Call Instead of a Fix
A trolley that won't catch after a couple of tries, or a lever clearly in the wrong position, are safe to handle without tools. Past that, the repairs get more involved: replacing a chain or belt means removing the rail and resetting travel limits afterward, and a logic board that's alive but faulting needs its force and travel settings tested against what the door actually needs, not just reset and hoped for. Opening the motor housing carries real electrical risk if the unit isn't unplugged first, and a board misreading resistance can mask a second problem underneath it. Past the trolley and the lever, a technician who can test the board directly and confirm whether the drive line needs replacing or just re-tensioning is the faster, safer path.
Where This Leaves You
Four things can put an opener out of commission while leaving the door itself completely healthy: the trolley connection, the belt or chain, the logic board, or a disconnect lever left in the wrong spot. Working through them in that order, simplest and most visible first, usually turns up the actual cause well before any tools come out, and rules out a spring or balance problem from the very first pull of the release cord.
Frequently Asked Questions
No. The cord is built to disengage a spring-loaded latch inside the trolley, and openers are designed to be released and reconnected repeatedly over their working life without any wear to the motor or drive line. The only caution is timing: release it while the door is fully down, since a door caught halfway can drop suddenly once it's disconnected from the opener's resistance.
Yes, and it's an easy cause to misdiagnose. A trolley that's only partially engaged can produce short, jerky travel that the logic board reads as an obstruction, triggering an automatic reversal that looks identical to a safety-sensor problem. Checking that the trolley is fully seated before suspecting the sensor eyes at the bottom of the tracks can rule this out in seconds.
Many logic boards carry a small internal fuse, often in the 3- to 5-amp range, that protects the board from a surge before the home's breaker ever trips. That's why an opener can go completely dead after a storm while every other outlet and light in the garage still works normally: the board's own fuse did its job and the breaker never needed to.
Sound is the fastest tell before you look at anything: a chain-drive fault is usually noisy, a rhythmic clack or grinding as the loose chain slaps the inside of the rail, since metal-on-metal wear rarely fails silently. A belt-drive fault tends to be quieter, more of a soft slip or a change in motor pitch, since rubber loses grip without much noise. Access differs too: the rail's snap-on cover pulls off by hand on most chain drives for a direct look at the master link, while belt drives more often need an access panel near the motor housing removed to see the belt's full run.
Not necessarily. On many smart openers, the Wi-Fi module that reports status to an app runs on a separate low-power circuit from the section of the board that drives the motor, so the app can show the opener as connected and available while the motor-control side of the same board has failed. App connectivity is a good sign for scheduling and remote access, not a diagnostic for the drive itself.
Rolling-code pairing with remotes and keypads is normally stored in non-volatile memory and survives a power loss without needing to be re-paired. Travel and force limits are a separate setting on some boards and can reset or drift after a surge or a board replacement, which is why a technician typically re-runs a short calibration cycle even when the remotes still work exactly as before.
Trace the fault from the trolley back to the logic board — a door that lifts by hand but ignores the button is a drive-line or safety-circuit problem, and Squared Away Garage Door Service handles both through opener repair in Pflugerville and safety sensor repair. Call (512) 456-3781.
