

How a Pro Realigns a Garage Door Track, Step by Step
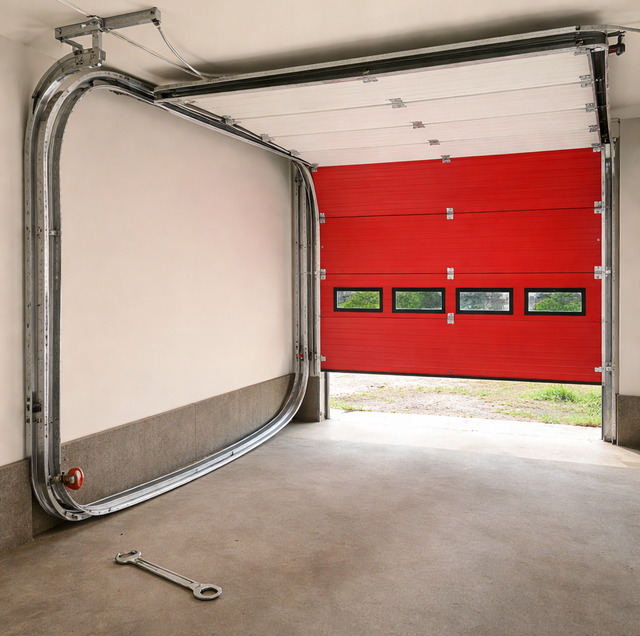
You notice it before you can name it. The door catches for a half-second on its way up, just enough that you glance over, and there it is: a sliver of daylight between one roller and the track wall that wasn't there last month. Or the opposite problem, a faint scrape on one side every single cycle, metal touching metal where it shouldn't. Neither one stops the door outright. Both are a track quietly walking out of alignment, and both get worse with every open and close until something binds hard enough to stop the door mid-travel or pull a roller clean out of the channel.
Track realignment sounds like a job for a socket wrench and a free afternoon. It isn't. The track bolts to the same frame that anchors a torsion spring holding a door's full weight in tension, and the steps below explain why a technician treats every one of them as a sequence, never a shortcut.
Why This Isn't a Weekend Project
A garage door track doesn't carry weight on its own. It guides rollers that are, at every moment the door is moving, suspended by a cable running to a drum on a torsion shaft, and that shaft is wound tight by one or two springs holding enough energy to lift the entire door, anywhere from a light single-car panel to an insulated double running well past 300 pounds. Loosen a bracket on a track that's under that kind of load without securing the door first, and the geometry holding everything in place can shift in a fraction of a second, not a slow drift you can catch and stop.
The real risk isn't a wrench slipping. It's a roller popping fully out of a track that's been nudged while the door is even partly suspended, which can let a whole section drop unsupported or swing free on one side while a cable stays taut on the other. A technician's process exists to prevent exactly that outcome, and every step below is built around keeping the door's weight fully controlled before any bracket is touched.
Step 1: Secure the Door Before Anything Else Is Touched
Before a wrench comes out, the door gets locked down so it physically cannot travel while the track is loose. With the door closed, that usually means a locking C-clamp or a pair of locking pliers set on the track immediately above the bottom roller on the affected side, so the door physically cannot travel upward even if the springs shift. (On a door that has to be worked partway open, the clamp goes below the roller instead, for the opposite reason: to keep the section from dropping.) If the opener is connected, the manual release cord gets pulled so the trolley disengages from the carriage, removing the chance that a stray remote signal or a bumped wall switch drives the door into a track that's mid-adjustment.
Working on a door with intact springs: the technician also checks the torsion spring and both cables for obvious damage first. A cable that's already frayed or a spring with a visible gap in its coil changes the job; those get repaired before track work starts, not after, since a track that's straight but hanging off a failing cable solves nothing.
Step 2: Check Plumb and Level With an Actual Level
Eyeballing a track against the door frame is how a technician confirms a rough problem exists, not how the fix gets measured. A 4-foot level gets held against the vertical section on each side to check plumb (dead vertical, not leaning in or out at the top), and a torpedo level or the long level laid across the horizontal tracks near the ceiling checks that both sides sit at the same height and pitch. This step produces the actual numbers the rest of the job works from, often a specific number of degrees off plumb or a measurable gap between the two vertical tracks at the top versus the bottom, rather than a guess.
This is also where the technician decides how much movement the track actually needs. A slab that's shifted an inch over several years from expansive clay soil underneath rarely throws a track out by more than a few degrees, and a few degrees is a very different repair than a track visibly pulled two inches off the wall from an impact.
Step 3: Loosen (Not Remove) the Mounting Brackets
The vertical and horizontal track sections bolt to the wall studs and the header through a series of mounting brackets spaced every few feet, plus a jamb bracket anchoring the bottom of the vertical run to the door frame itself. The technician works down the run loosening these bolts with a socket wrench, just enough that the track can move a fraction of an inch inside the bracket's slotted hole, never removing a bolt entirely and never taking more than one or two brackets loose at once. A track with every bracket fully removed has nothing holding its position at all, which turns a controlled adjustment into the same free-fall risk the door was clamped to prevent.
Working one section at a time also keeps the rest of the track supported, so the loosened section's weight stays distributed across the brackets still snug on either side of it.
Step 4: Tap the Track Back Into Alignment in Small Increments
With a bracket loose, the technician taps the track sideways with a rubber mallet, a fraction of an inch at a time, then rechecks it against the level before tapping again. This is closer to truing a slightly bent bicycle wheel than to bending sheet metal: you never force the whole correction in one motion, because a track that's over-corrected in one direction is now wrong the other way, and a track pushed too hard against a stud can bow instead of shifting cleanly.
Between taps, the technician also slides the roller through the section being adjusted to confirm it's tracking smoothly through the full width of the channel, not just that the rail itself measures plumb. A track can read correctly on the level and still pinch a roller if the channel's internal width has been squeezed slightly out of shape by whatever knocked it out of alignment in the first place.
Step 5: Torque the Brackets Back Down
Once a section checks plumb and the roller glides freely through it, that bracket's bolts get tightened back to snug: firm enough that the track can't shift under normal vibration, but not so tight the slotted hole strips or the track pinches narrower than the roller needs. The technician moves to the next bracket down the run and repeats loosen, check, tap, torque, working section by section rather than loosening the whole track at once. Only after every bracket on the affected run is torqued down does the clamp holding the door in place come off.
Step 6: Cycle the Door and Recheck Balance
The last step isn't optional, and it isn't quick. The technician runs the door through several full open-close cycles, watching each roller travel the length of the track and listening for any scrape, catch, or grinding sound that a static check with a level wouldn't reveal. A track can measure plumb while stationary and still bind under the load and motion of an actual cycle, particularly right where the vertical section curves into the horizontal run near the ceiling.
The opener goes back onto the trolley afterward, and balance gets rechecked one last time with the release cord pulled: with the door off the opener, it is lifted by hand to about halfway and let go. A door that holds its position confirms the springs and the newly aligned track are carrying the weight the way they should. One that drifts down or shoots up on its own points to a spring problem uncovered by the alignment work, not caused by it, and that gets addressed as its own repair before the job is called finished.
What Actually Throws a Track Out of Alignment
Track realignment is a repair, not routine maintenance, because a properly installed track on a stable frame doesn't wander out of position on its own. Something moves it. In areas with expansive clay soil, the most common cause is the ground itself: that kind of soil swells when it's wet and shrinks when it dries out, and the cycle, repeated across enough wet-dry swings, can shift a slab or a door frame by a fraction of an inch a year until a track bolted to that frame is measurably out of plumb even though nobody ever touched it. A hard impact, a bumper backing into the bottom panel, a ladder falling against the track, does the same thing in one event instead of over years. So does a snapped cable letting one side of the door drop suddenly and torque the track sideways as it falls. High cycle counts play a role too: a garage used as the main entry to the house opens and closes far more often than the two-cycle-a-day the hardware was rated around, and every one of those cycles puts a small amount of stress on the same bolted joints.
Frequently Asked Questions
Look at the pattern, not just the symptom. A track problem usually shows up as a visible gap between a roller and the rail, or a door that leans and scrapes toward one side while still moving at a normal speed. A spring problem shows up as effort, not geometry: the door feels heavier than usual, drops on its own when lifted by hand, or the opener strains and hums without much movement. The two often get confused because a severe spring failure can eventually pull a track out of alignment too, but the track symptom alone points to the rail, not the coil.
A mild bend, a few degrees off plumb from ground movement or a minor bump, is exactly what the tap-and-recheck process corrects. A track kinked, dented, or crimped at one of the coupler joints where vertical sections bolt together is different: metal creased at a joint tends to have lost its strength even after it's tapped back into shape, so a technician usually replaces that section instead.
Beyond the roller working further out of the channel, a forced off-track cycle can crack a hinge stile where the panel meets the roller bracket, or bind hard enough that the opener's logic board reads the resistance as an obstruction and reverses the door mid-cycle, sometimes repeatedly, wearing the drive gear a little more each time. A healthy drive mechanism can end up damaged by a problem that started somewhere else entirely.
Only if the noise is a grinding or scraping sound tied to the misalignment; that clears up once the roller is tracking cleanly again. A rolling squeak or rattle that continues afterward is usually a separate issue: dry roller bearings or worn hinges needing lubrication or replacement, and steel rollers versus nylon rollers wear differently enough that the fix isn't always the same part twice.
Only if whatever moved it in the first place is still active. There's a practical way to tell which kind of cause you had: a technician who realigns the track will often also mark or note the bracket position, so a follow-up visit months later can measure whether the frame has actually shifted again versus the bracket simply working loose from vibration, two problems that look identical from the driveway but call for different fixes.
Adding a spacer behind a bracket changes how far the track sits from the wall, and doing that without first checking plumb across the whole run can pinch the roller tighter in the shimmed section while leaving the rest of the track just as misaligned. It often relocates the binding point to the curved section near the ceiling instead of solving it, and that's the hardest place on the run for a wedged roller to let go safely.
Track work touches the one part of a garage door system where a small, controlled adjustment and an uncontrolled one look identical right up until the moment they don't. Getting the sequence right- secure first, measure before moving anything, small increments, full cycle test at the end- is what keeps a five-minute misalignment from turning into a dropped door or a bent panel.
Hand the realignment to a technician through off-track door repair in Pflugerville, and ask about roller and hinge replacement in the same visit, since worn rollers are what walk a track back out of line. Call (512) 456-3781.
